Pinterest is all fun and exciting, until you realize you have to create pins in order to share them on Pinterest.
And when you’re told that you need to share 10-20 posts a day, have a million boards (which I’ve already debunked both of those in How To Set Up Your Pinterest Business Account) it can be very daunting to get started.
I know it was that way for me too, until I realized that’s for people who have 50+ blog posts and content from other sources.
I’m talking with the small businesses just getting started, tired of having to post something new every single day. We’re going to keep it simple and show how it’s possible to create more with less.
Let’s dive in!
We’ll break down:
- What is a pin
- What is Canva, and free vs paid
- How to design pins
- What colors to use
- What images to use
- Plan and share new pins
What is a Pin
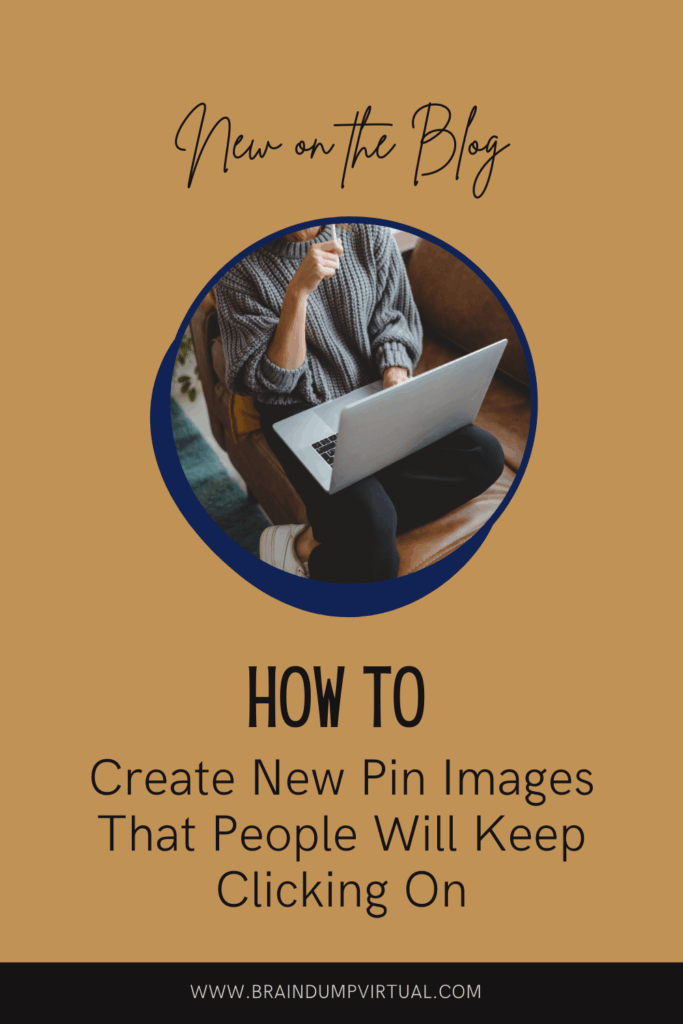
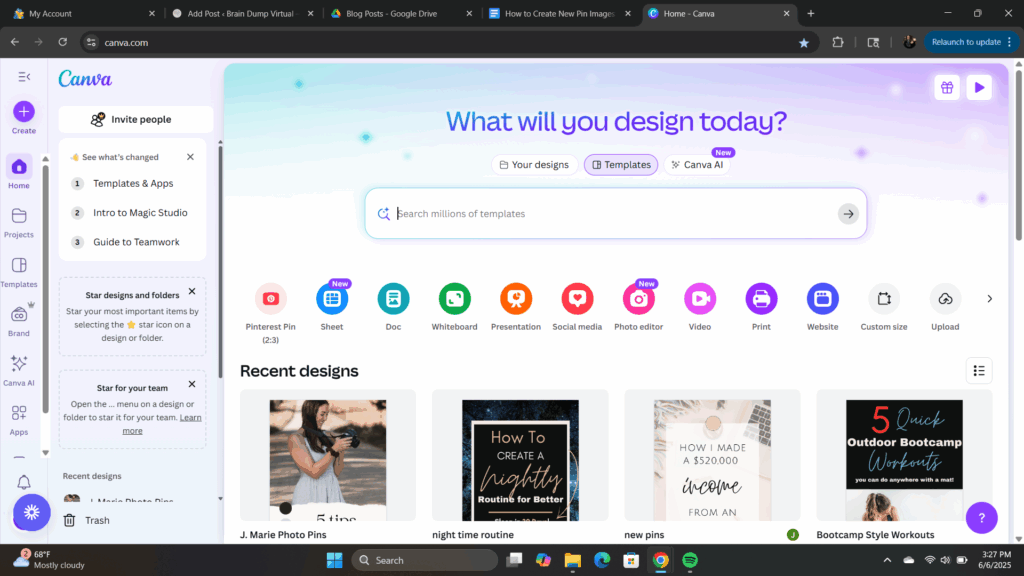
Starting out with the basics, what’s a pin. A pin, on Pinterest, is an image that’s 1000 x 1500 px, or 2:3 aspect ratio (I have an example above that you could save to Pinterest!).
That’s the size that Pinterst wants their pins to be. Just the same as Instagram has a certain size that works best for their platform, Pinterest is the same.
Now, you may be thinking, I’ve seen other size images. I’ve saved them! Well, me too.
But this is the size that Pinterest likes and looks to promote. It is a platform that’s been around for over a decade, so there will be some things that have changed over the years.
So, what do you do with this information now? Here is where we’ll get into the simple way of creating your pins. And that will be through Canva.
What is Canva
If this is your first time hearing about Canva, I’m so excited to introduce you to your new best friend! Even if Pinterest ends up not being your main form of sharing on the internet, Canva has SO many ways to create beautiful graphics, ebooks, handouts, printables, etc.
They have a free option, which you are able to do a lot with, and then a paid version. I’m currently signed up for the paid version, and it is about $16/month.
Now there are a lot of great benefits to the paid option, just a few being more access to template ideas, if you create a logo you have the option to get a transparent background, and access to more graphics and pictures. They do have a 30 day free trial so if you’re interested, definitely try it out!
But everything I’ll break down from here is all possible with the free version too.
Starting with…
How to Design Pins
Just keeping it simple, you click in the search bar, type in Pinterest Pins, click the one with the 1000 x 1500 px sizing, and see all the options under designs to the left.
Now, if you’re a photographer that doesn’t have any blogs to share yet, all you have to worry about is that your pins are the correct size, but otherwise you can get away with your pictures because THAT is your topic. Again, just make sure the keywords are correct.
There are plenty of people that you can buy their template designs, but honestly, there are so many options with Canva, I’d start there.
And since Pinterest marketing takes time, whether it’s organic or paid, you might as well play around and see what gets traffic or not.
Now, there are going to be a few things to keep in mind though. Since Pinterest is able to read the image, any text you put on there, make sure it’s nice and clear. I’ve seen where it can be hard for Pinterest to read cursive, so it’s recommended that if you do use a cursive font, that it’s on words that are keywords. So something like “the”, “and”, “to”, etc.
But I do see pins that do really well with cursive on main words like “blog”, “photography”, “workout”, etc. If you do want to use cursive, just make sure that you’re using the correct keywords in your title and description too.
I explain keywords in The Importance of Keywords and Trends on Pinterest.
The main thing with designing or picking a design for your pins is that it makes sense for the topic you’re sharing and just looks nice. Everything else will be trial and error, just like with anything.
What Colors to Use
Colors is going to be up to you as well. I’d recommend using your brand colors that you put together when you created your business.
If you don’t have brand colors, you can look up “brand board” on canva and just fill it out. Find colors that work well together, and you can even do this on Pinterest! Look up the color or vibe you’re going for, scroll through some ideas, and find the HEX number. You can usually find some where it’s listed on the picture.
But once you have your brand colors, and you have the paid option, go the “Brand” on the left-hand size, and click add new brand kit.
There you can add in your colors so when you go to create your pins, which I just learned about this and LOVE it, you can click on Brand, click on the colors, and it will shuffle through those colors with the template design you’re using! This honestly changes everything and takes a huge step out of creating new pins.
I love it, and strongly recommend it if you’re planning on committing to Pinterest.
If this is getting to be a bit too much for you, don’t stress! Right now you can sign up for my Pinterest Account Set Up offer where I’ll get your account set up AND create 10 pins to get you started. I have limited spots, so if you’re interested, you can read more about that offer.
What Images to Use
Again, if you’re a photographer, you’re using your pictures. You’re welcome and can head onto the next step.
Otherwise, any pictures that are yours, you’ve taken or go with your content. I use the options Canva has for background images, or just use text.
The main goal is whatever is going to grab someone’s attention.
If they’re looking for a specific thing, like clothes, poses, etc. You’ll want less or no words, focusing on the picture, and keywords in the description.
If it’s a topic, how to, designs, or anything where a description will catch their attention, then maybe a simple background will do.
Again, if you’re sharing the latest workout program you created, don’t have the background be a tree. Make it make sense for your audience and whatever will draw them in.
As always, keep it simple, don’t overthink it, and just start somewhere.
Because the main goal is getting your content out there.
Plan and Share New Pins
The main thing you need to know is plan ahead, schedule out, batch and move on with your life.
Again, we’re starting simple, we’re not 20+ boards and 15+ pins a day people. We’re just getting started.
Now, for a more in-depth explanation on scheduling, check out How to Schedule Out Your Pinterest Pins.

But the basics is, on your profile, there will be a + near the bottom right. When you click that, there will be an option to create a pin or board. You’ll click pin and then fill out everything that it asks.
At the very end, there’s an option to schedule, and you can schedule up to 30 days out and 10 pins at a time. So just starting out? Free scheduling! Create 10 pins, schedule them out over the next 2-4 weeks and call it a day!
I do have a free Pinterest Planner. It’s SUPER simple and comes with a quick audio on how to prep it. But it’s basically what I do for myself and my clients.
Again, once you have more content there’s things like Tailwind that take care a lot of this for you on a MUCH bigger scale. But it doesn’t have to be as hard or scary as we make it out to be.
It’s all just starting out, see what works and what doesn’t.

Now, if you’re wanting more help than the blog topics and freebie, I have a few options where I can do all of this for you!
First off, I can set all of this up for you! You can sign up for my Pinterest Account Set Up. Spots are limited before the price goes up, so if you are curious, I’d check it out now.
And secondly, if you have your account, but the thought of spending more time creating and scheduling content is defeating rather than exciting, I do offer Pinterest Management. This is where I take over your Pinterest account for business, create and schedule pins, do the keyword and trend research to provide content ideas for you, and create a plan to increase your website traffic and sales.
Any steps you take and progress you make is only going to help you in the future.
Don’t stop because you’re unsure! Keep working at it and happy pinning!